This tutorial walks through the WebChangeDetector webapp: a centralized agency dashboard for managing change detection across all your client WordPress sites from one place.
The WebChangeDetector Webapp: What It Is
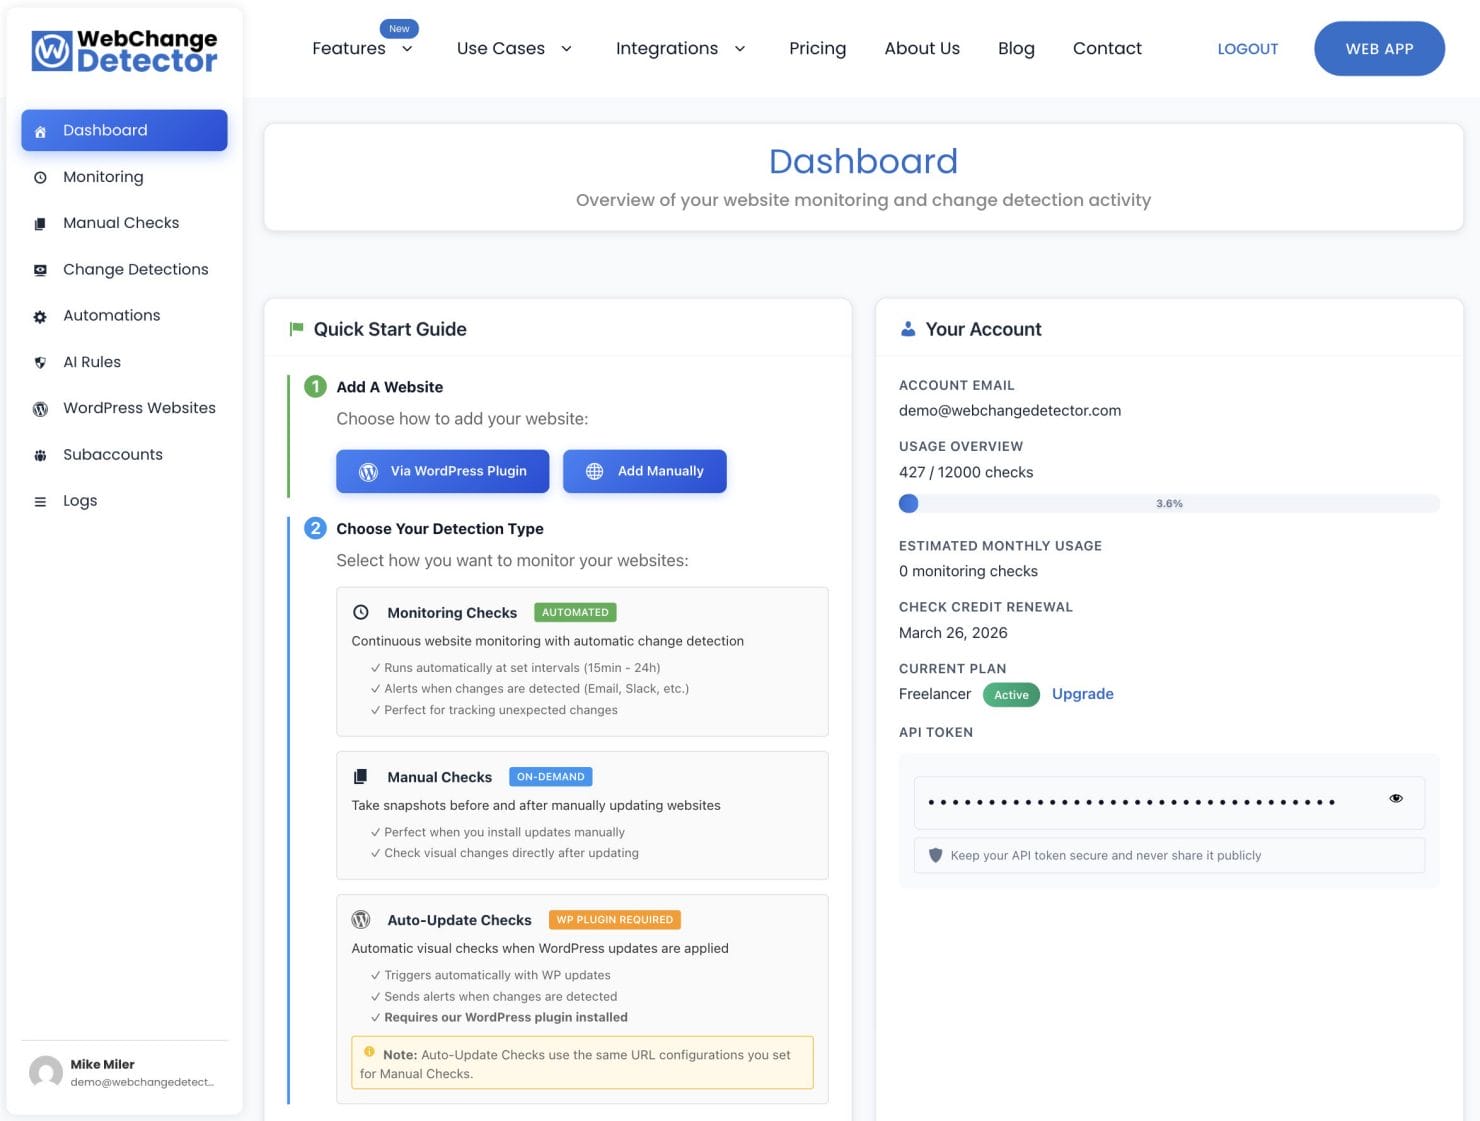
The webapp is a centralized dashboard where you connect all your client WordPress sites and manage all change detection from one interface. Your clients never see it. You use it to configure monitoring, trigger on-demand checks, review detected changes, and manage notifications.
The dashboard is organized around three detection methods:
- On-Demand Checks: A four-step before/after workflow you trigger manually before applying updates. Best for planned maintenance windows.
- Continuous Monitoring: Automated screenshots taken at set intervals (every 15 minutes up to every 24 hours) compared against the previous run. Best for catching unexpected changes.
- Auto-Update Checks: Fully automated. The WCD plugin intercepts WordPress’s auto-update process, captures before/after screenshots, and sends you an email report. Zero manual steps.
Each detection method has its own dedicated guide (linked above). This post focuses on what makes the webapp uniquely valuable for agencies: centralized site management, permissions, subaccounts, and automated workflows.
Step 1: Add Your Client Sites
Start at the WordPress Websites tab. This is where you register and configure each client site.
For each site, you have two setup options:
Option A (recommended): Install the WCD WordPress Plugin
Install the WCD Plugin. Once the plugin is installed and connected, the site appears as active with a “last seen” timestamp and plugin version indicator. If the plugin version is outdated, a stale indicator appears so you can prompt the client to update.
To use the WP Auto Update Checks, the WebChange Detector plugin is required on the website.
Option B: Add the Domain Manually
For sites where you cannot (or don’t want to) install a plugin, add the domain directly and manage everything from the webapp side. The WP REST API must be enabled on the WP website to make make this work.
WebChange Detector plugin permissions
Once sites are added, configure per-site permissions. The webapp gives you more than 20 granular toggles controlling exactly which tabs and features each site’s users can see. For example: a client site might show the client their own Change Detections tab but hide the Monitoring settings so they do not accidentally reconfigure anything. Toggles cover tab visibility (On-Demand Checks, Monitoring, Change Detections, AI Rules, Settings, Logs) and feature access (start/stop checks, add URLs, edit settings).
If you are adding multiple sites with the same permission configuration: use the bulk edit feature. Check multiple site rows, click “Bulk Edit Settings,” and apply your standard permission template to all of them in a single action.

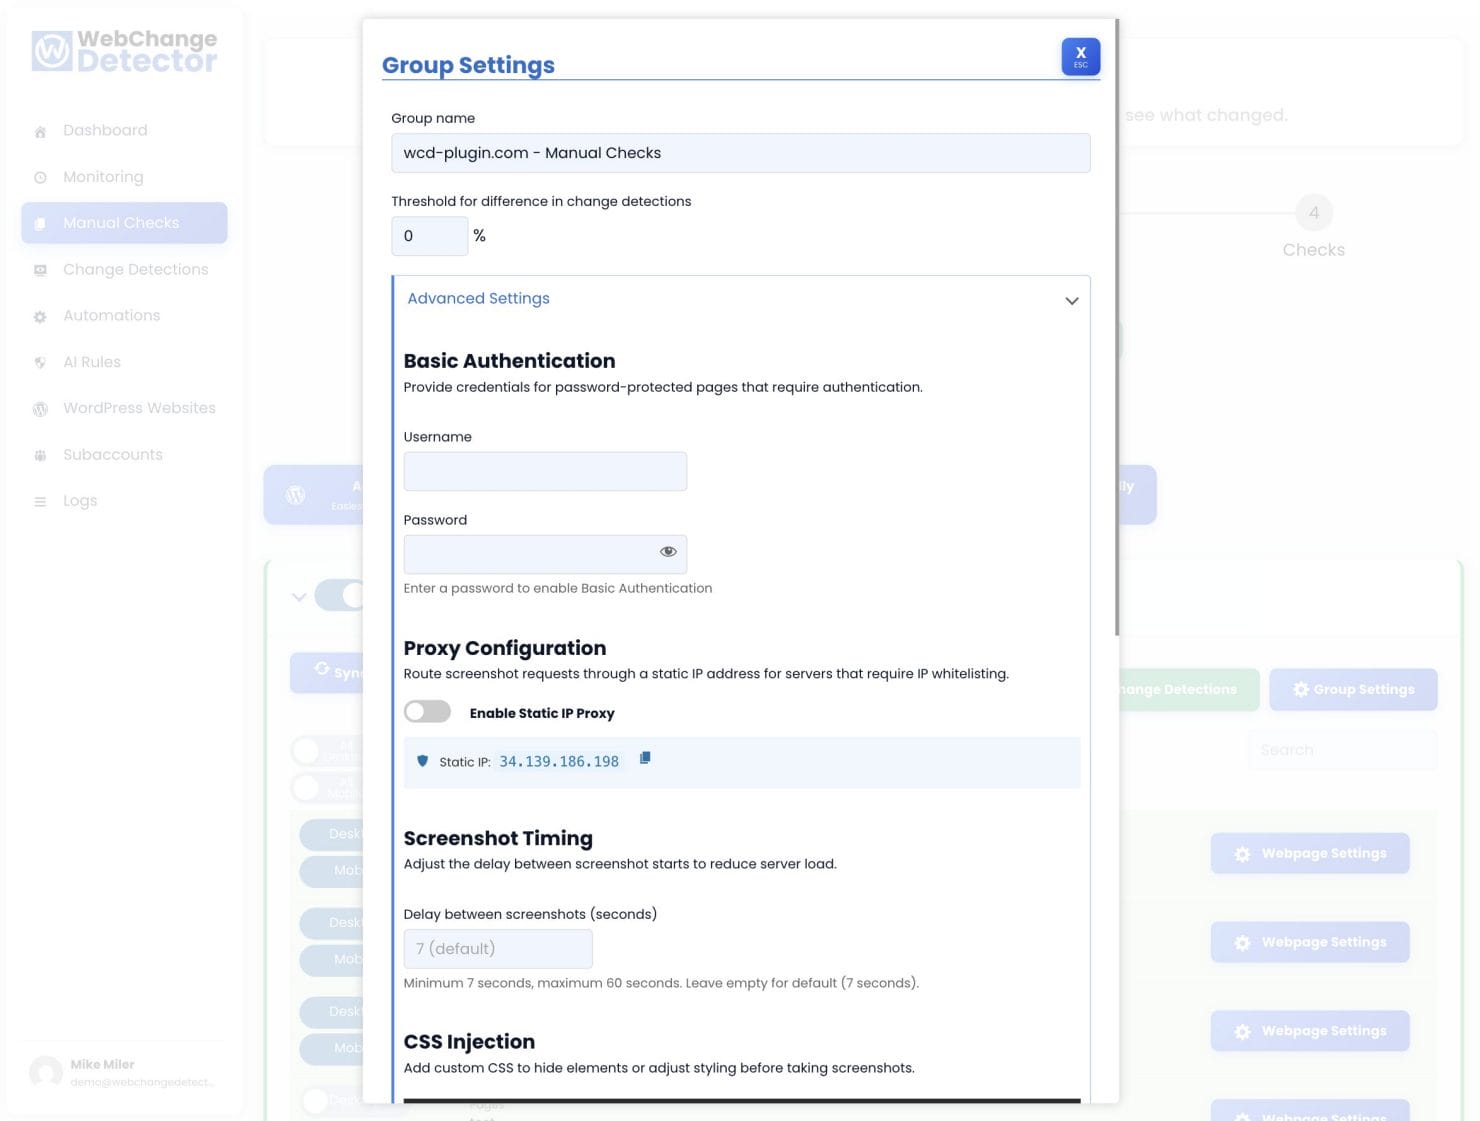
Configure URL Groups
Every detection method in WCD is organized into groups. A group is a container holding a list of URLs plus all the settings that apply to those URLs: threshold, screenshot delay, authentication credentials, notification emails and more.
When you connect a WordPress site, two groups are auto-generated:
- On-Demand Group: Used for on-demand checks and WP auto-update detection
- Monitoring Group: Used for continuous monitoring
To populate a group with URLs, use the WordPress plugin sync (automatic), the WordPress REST API sync, or add URLs manually. For each URL, choose whether to check it on desktop, mobile, or both.
Group settings include threshold, screenshot delay, CSS/JS injection, basic authentication, and proxy configuration. For the full details on all settings, see the Monitoring guide.
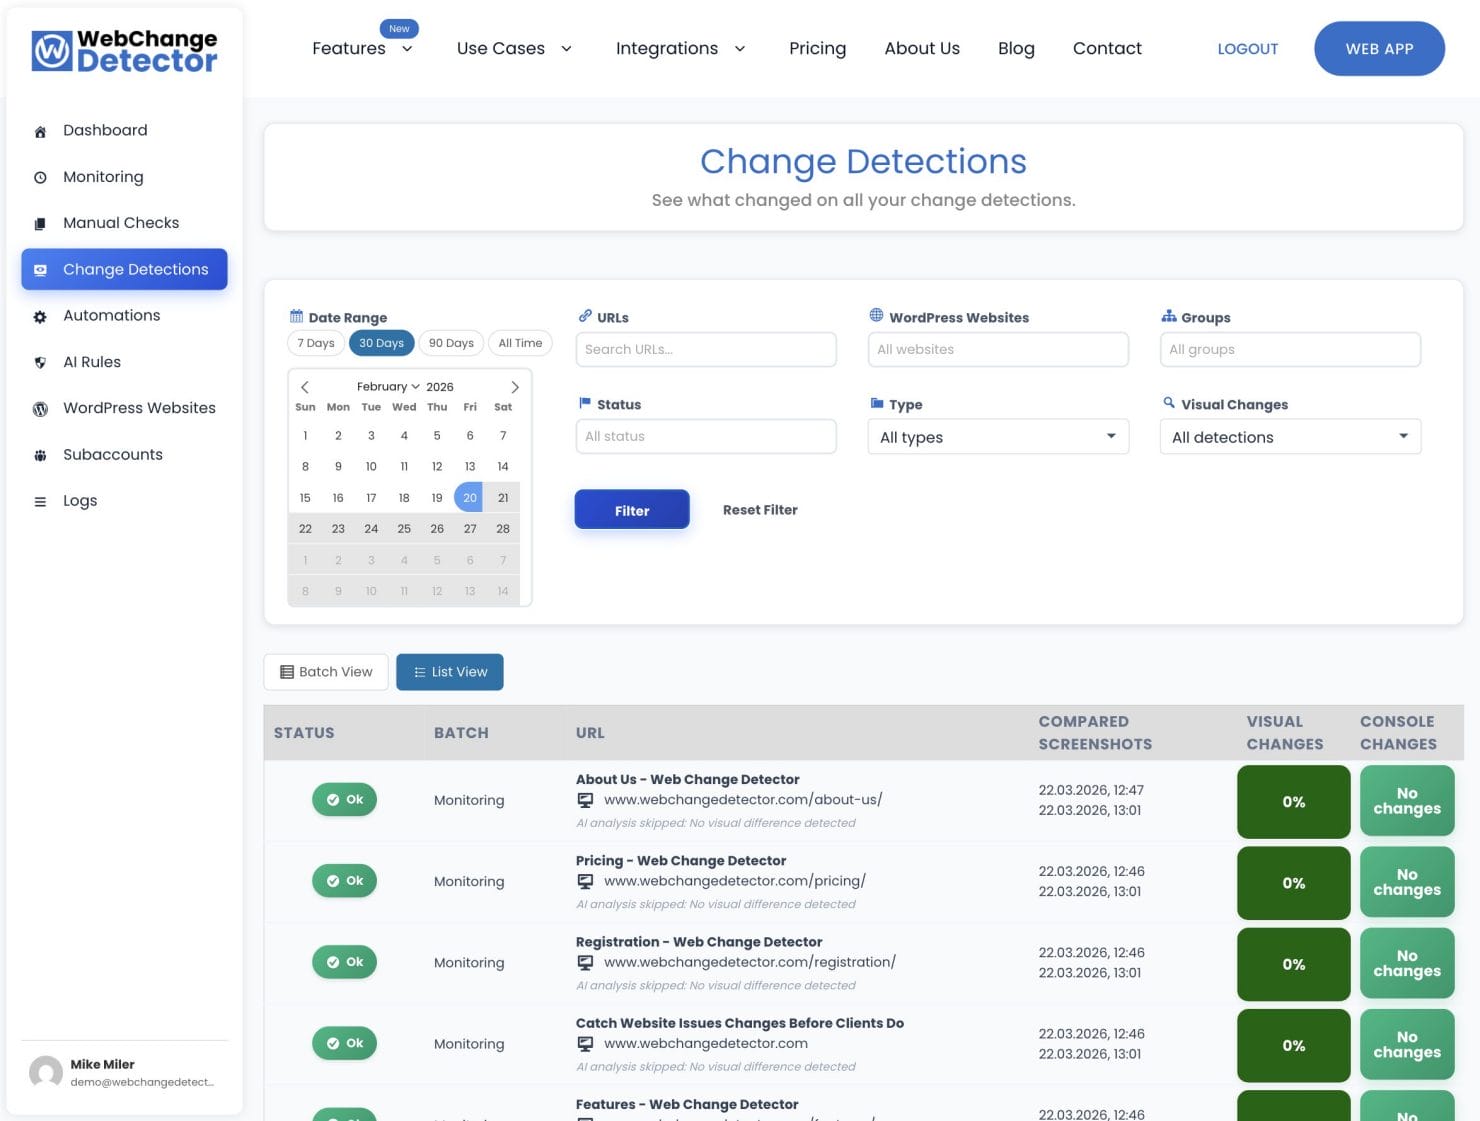
Reviewing Changes
All three detection methods feed into the same Change Detections tab. Filter by date, group, URL, or status to triage across all your client sites. Each comparison opens a popup with before/after slider, diff overlay, and AI-powered analysis that classifies changes as real issues vs. expected dynamic content.
For the complete review workflow, including AI categories, feedback rules, and best practices, see: How to Review Change Detections.
Automations and Webhooks
Email alerts work, but many teams want change detections to flow directly into their existing tools. The Automations tab handles this with webhook support and Zapier integration.
Common use cases:
- Post a message to a Slack channel when an Alert is detected on a client site
- Create a Trello or Asana task when a change is flagged as “to fix” or “new”
- Notify a specific team member via email when a high-priority site triggers an alert
- Log all detection results to a Google Sheet for client reporting
Setup: Go to the Automations tab, click “Create Webhook,” enter your webhook URL (Zapier trigger, Slack incoming webhook, or custom endpoint), map the payload fields, test the delivery, and activate. Zapier’s integration connects WCD to 6,000+ apps without code.
Subaccount Management for Larger Agencies
If you want to give individual clients access to their own monitoring data, use Subaccounts.
From the Subaccounts tab, create a subaccount per client. Each subaccount gets its own API token, separate check limits, and an isolated view of their assigned sites. Use “Switch to Account” to operate as that subaccount without logging out.
The main account manages all subaccounts: set check limits, edit details, delete. Subaccounts are managed only from the main account, so there is no risk of a client accidentally accessing another client’s data.
A Typical Agency Workflow
Here is how this looks in practice for an agency managing a portfolio of client sites:
Initial Setup (One-Time)
- Install WCD plugin on each site (urls get synced automatically)
- Configure per-site permissions in WebApp (what clients can see)
- Configure URL groups (threshold, device types, notification emails)
- Enable monitoring on each group (24-hour frequency is a solid default)
- Enable auto-update detection on all sites with WCD plugin
Ongoing, Automatic
- Monitoring runs every 24 hours and sends alerts when something changes
- Auto-update detection runs whenever WordPress applies updates and emails reports
- AI feedback rules filter out known false positives over time
Planned Maintenance (Before/After Each Update Session)
- Open On-Demand Checks, take pre-update screenshots for the sites you are updating
- Apply updates across all affected sites
- Return to On-Demand Checks, take post-update screenshots
- Review Change Detections, investigate any alerts
Weekly Review
- Filter Change Detections to the past 7 days
- Filter by status “new” to see all checks with changes that matter
- Click through the high-priority items, use the comparison popup to verify
- Mark resolved items, create AI feedback rules for persistent false positives
That workflow gives you complete visual coverage of every client site with about 30 minutes of active review time per week, and immediate notification for anything that needs urgent attention.
Getting Started
The setup for a new site takes under 10 minutes: add the domain, install the plugin, sync URLs, configure the group, turn on monitoring. From there the system runs itself.
Start with your highest-priority client sites and expand from there. Even with monitoring active on just a handful of sites, you will catch your first update regression within the first few weeks, and it will be a regression you would otherwise have found out about from a client.